Table of Contents
- Working in 3D Space
You will be working in a three dimensional space (XYZ). Your mouse is a two dimensional pointing system and your computer screen can only show a flat image, so Hexagon proposes different ways of working within these limits.
Navigation is the movements of the virtual point of view, or camera, around the scene. When you want to inspect your model from all angles or zoom in, you will need to navigate in your 3D space.
Hexagon offers three ways to navigate: by the icons in the control panel, by the mouse and by the keyboard
In the control panel at the bottom of your workspace, you will find two groups of icons which deal with navigation:
Holding down the mouse button on an icon navigates directly on the icon, or
click on an icon, turning your mouse cursor into that icon, and navigate directly in the
3D Workspace by click-dragging and return to 3D manipulation by clicking on the
![]() icon.
icon.
input, where you want to place your camera. Once you have placed your target point, or the virtual eye, Validate the tool to continue working.
Additional mouse navigation commands:
Remarks:
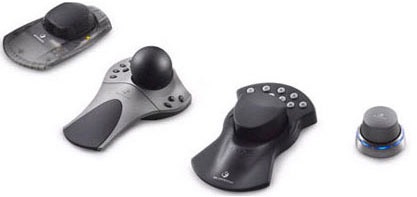
3Dconnexion motion controllers allow you to navigate more efficiently in the 3D scene while modeling.
These devices have a single controller that transforms your movements into camera movements.
There are several types of motion controllers from 3Dconnexion: SpaceMouse, SpaceBall, SpaceTraveler, Cadman, SpacePilot, and more. They are all based on the same architecture and use the same device driver, which is supported by Hexagon.
The possible camera movements are:

To work in 3D space (to draw a profile, move an object) the proposed method used by most 3D programs is to work always on one plane in 3D space.

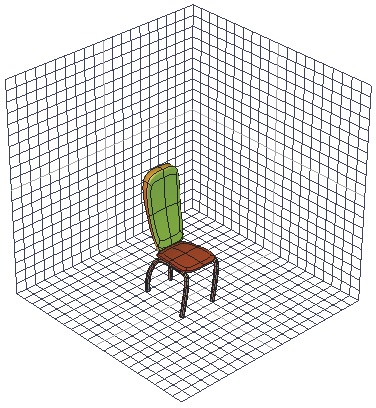
The three reference grid guides.
By default, Hexagon lets you work in the so-called absolute planes, symbolized in the 3D Workspace by three reference grid guides. The horizontal plane (XZ), the vertical plane (XY) and the transversal plane (YZ).
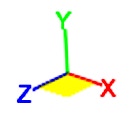
The axis indicator on the lower left of the 3D Workspace is the 3D trihedron. When you move around the 3D space, you can see that the active working plane is symbolized by a white square touching two of the axes. By default, Hexagon automatically chooses the best working plane for your view, or the one that is the most perpendicular to the camera position.

The 3D trihedron.
You can force Hexagon to make another working plane active that is not automatically proposed, by clicking on the faces of the 3D trihedron to work in that plane. Click again on that same face to return to automatic mode.
You also might not want to work with the default XYZ planes, but with what is called the camera plane. This can be compared to having a piece of paper that is always held out in front of you, turning as you change your view, always staying perpendicular to your field of view.

The default and camera planes switch button.
Activate this plane by clicking on the camera button on the manipulators palette. Come back to the three absolute working planes by clicking on the XYZ button.
In some cases you may want to work on a plane defined by the face of an object (the side of a pyramid for example) in order to manipulate an element on this plane or perpendicular to it.
Usage:
 button on the manipulators sub-palette.
 button to come back to the default planes.
This functions:
 ,
, .
.These two actions have the same result, and you can choose whichever you are most comfortable with.
When you have no further use for the custom working planes, reset the planes to the default, so that further created objects will not be created in an unwanted orientation.
The working planes are taken into account when lines and forms are created, or certain tools are used. The 3D manipulators is an exception. If the manipulators are on Selection or Bbox mode, these planes are ignored. See the chapter on the 3D Manipulators for more details.

The three modes of the 3D Manipulators in the sub palette.

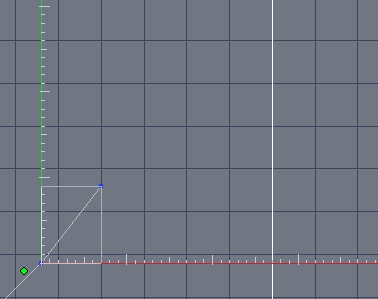
The 3D Guides while drawing a polyline.
Hexagon uses in some cases 3D guides (two perpendicular axes) ![]()
![]()
![]() ,
that can also show incremental measurements. They permit you to work precisely with
distance measurements within certain tools. They also let you restrict your work to one
axis only.
,
that can also show incremental measurements. They permit you to work precisely with
distance measurements within certain tools. They also let you restrict your work to one
axis only.
These 3D guides are in the active working plane automatically when using certain tools. If your camera is facing your object, Hexagon shows you only the X axis (horizontal, in red) and the Y axis (vertical, in green) and you can apply constraints to one axis by using the Space bar.
The incremental measurement snap to the 3D guides can be activated by clicking on the
![]() icon in the control panel. When the snap is active, the lines snap to each
unit or tenth of a unit, depending on the measurement unit chosen.
icon in the control panel. When the snap is active, the lines snap to each
unit or tenth of a unit, depending on the measurement unit chosen.
To increase or decrease the units, use the +/- keys.
The last used axis constraint of the 3D guides will continue to apply to current and future tools. Using the Space bar, you can flip the constraint again to the other plane, or again to have no constraints on your cursor (the default mode).
It is important to keep in mind the fact that the Space Bar will allow you to apply vertical or horizontal constraints while using a tool which uses 3D Rulers, such as drawing tools or snap/align or the symmetry tool.
Hexagon is a program which can work without constraints in a freehand style, but can as well use precise number input, or parameters, for the majority of the tools.
By default, Hexagon works in relative mode: all new values are defined by the previously entered values. For certain uses, it is necessary to define an origin to your 3D universe, which is by default in the center of the horizontal grid guide, and inputting a value in reference to this point is referred to as absolute mode.
Changing from relative mode to absolute mode:
Remark: