Table of Contents
- Surface Modeling
The Surface Modeling tab of the modeling palette contains a number of tools for creating surfaces and polyhedral volumes. These tools let you build complex surfaces very simply, using 2D lines and curves as the basis of sections and profiles.
Most of these tools support dynamic geometry, so you can return and edit the original curves (if you are working in full or partial DG) and have your complex surfaces updated in real-time.
![]() The ruled surface tool lets you create a surface between several existing
curves which will become the sections of that surface.
The ruled surface tool lets you create a surface between several existing
curves which will become the sections of that surface.
The most common example is the creation of a face: create a group of vertical sections going from the nose to the outer ear, then with the ruled surface tool, select each curve one after the other and the face will be created.
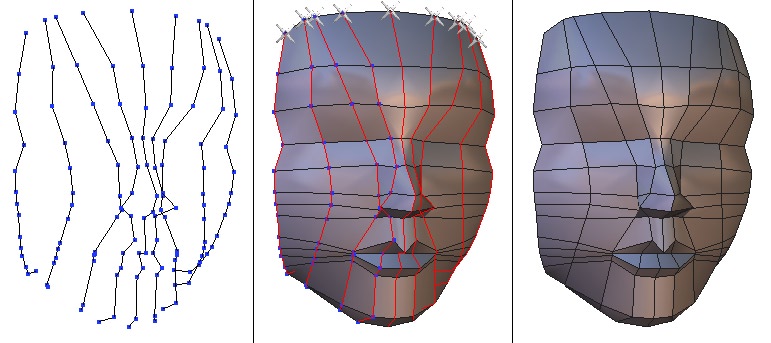
From left to right: the sections, the surface creation and the final result.
Another example is the hood of a car: draw the lateral profile, the center profile, and maybe one in between if needed, and using this tool, select one after the other to create the hood.

On the left are the sections, and on the right the finished hood of car.
Usage:
Options:
Remarks:
![]() The double sweep tool lets you create a surface or volume from a section
and two profiles connected to it.
The double sweep tool lets you create a surface or volume from a section
and two profiles connected to it.
An example of this tool is creating a roof gutter, including rounded edges: using an arc for the section, and two lines for the profiles.

On the left, three lines making up the gutter, and on the right, the end result, after having clicked on the section line, and then selecting the double sweep tool and clicking on the two profile lines.
Modeling a rugby ball is also easy with this tool: a circle in the middle for the section, and two profiles connected at their ends and to the circle in the middle. The end result is a volume.

On the left, three lines making up the ball with the section in the middle, and on the right the end
result after having clicked on the section line, and then selecting the double sweep tool and clicking
on the two profile lines
Usage:
Options:
Remarks:
![]() The Coons surface tool lets you create a surface between a closed curve, or
several open curves connected together.
The Coons surface tool lets you create a surface between a closed curve, or
several open curves connected together.
This tool is very useful for the creation of complex shells, for example when two profiles and two sections are necessary. If we use the example of the car hood of the Ruled surface tool, we can see that it could be difficult to create such a complex form quickly.
Using the Coons surface tool, you can define a curve for the lateral part, one for the center, and one for the front, and finally another for the back. Hexagon will then create the surface.
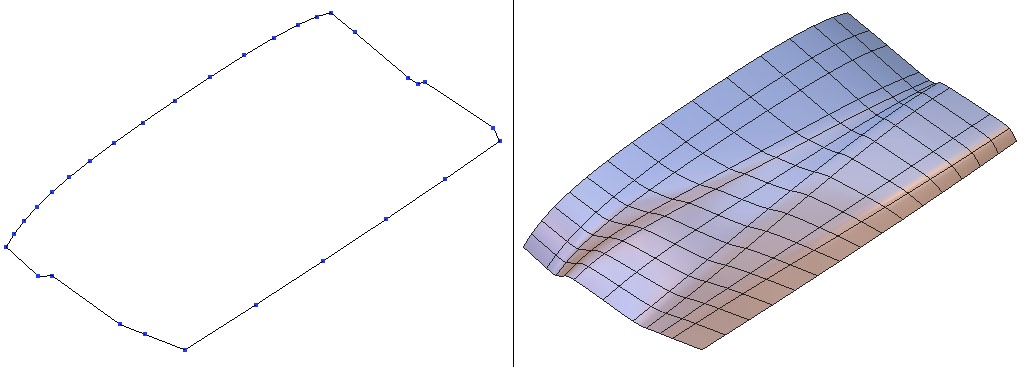
On the left the support curves for the car hood, and on the right the finished surface.
Usage:
Remarks:
![]() The Gordon surfaces tool lets you create a surface defined by a series of
latitudinal cross sections and longitudinal profiles. These must be created before
the use of this tool.
The Gordon surfaces tool lets you create a surface defined by a series of
latitudinal cross sections and longitudinal profiles. These must be created before
the use of this tool.
This tool is used for the creations of complex surfaces often based on very precise curves, like a custom bottle for example.
The bottle could be made using a sweep or double sweep tool, but they may be too limited for a complex project.
Generally this tool is often used in product design.

On the left, the precise curves with connected sections and profiles, and on the right the generated result.
Usage:
Remarks:
![]() The extrude line tool lets you create a surface or volume, from a section or
a profile previously created. The result gives an object which the profile is
positioned on each point of the section, in alignment with the center of the section.
The extrude line tool lets you create a surface or volume, from a section or
a profile previously created. The result gives an object which the profile is
positioned on each point of the section, in alignment with the center of the section.
Not to be confused with a “lathe” operation, which places the section at each point on the profile, while modifying its radius. With the extrude line tool, it is possible to extrude from a star shape, square, etc.
The extrude line tool is one of the most common and basic tools of surface modeling. A well-known example is a glass of wine: just draw a circle for the section and draw a profile matching the curve of the glass and you will quickly have a perfect result.
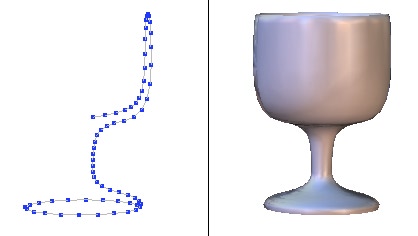
From left to right: the section and profile curves, and the resulting surface.
Usage:
Options:
For the freehand method, there are four modes of extrusion, where the height is the distance of the new section from the previous, and the width is the size of the new section:
Remarks:
![]() The sweep line tool lets you generate a surface or a volume from a section,
and eventually a profile curve already drawn and at its center. The result is an
object where the section is repeated along the profile, without modification of size.
The sweep line tool lets you generate a surface or a volume from a section,
and eventually a profile curve already drawn and at its center. The result is an
object where the section is repeated along the profile, without modification of size.
The sweep line tool can be used for all sorts of tube forms, such as a door handle, or shower head.
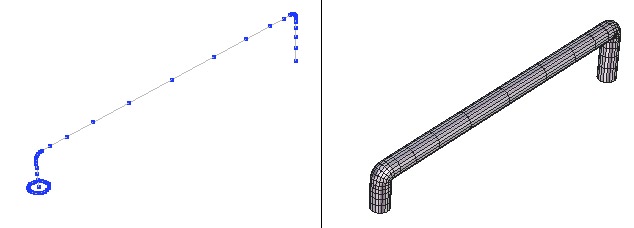
On the left the section and profile and on the right the resulting surface.
The tool is most often used in a freehand method, which lets you change the size of each section, for example the shower head.
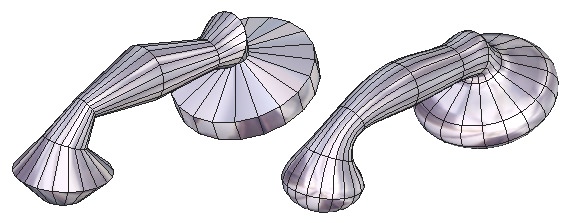
The creation of a shower head.
Usage:
Options:
Section alignment: Three kinds of alignment are available for the sweep tool. These options are available once the surface is generated, at the time Hexagon proposes to close the openings, but are not modifiable once the tool is validated.
These options are available for both methods of sweeping.
Modes of sweeping: For the freehand method, there are four modes of extrusion, where the height is the distance of the new section to the previous, and the width is the size of the new section:
Remarks:
![]() The boolean tool generates a surface or volume by using two objects (or
group of objects) in an operation such as difference, union, subtraction, addition,
(etc.) between the two objects.
The boolean tool generates a surface or volume by using two objects (or
group of objects) in an operation such as difference, union, subtraction, addition,
(etc.) between the two objects.
The tool works on 2D lines as well as surfaces.
Boolean operations have always been used in 3D modeling, because this operation lets you add and subtract 3D objects easily, therefore make complex forms rapidly.
An easy example is making a hole in a wall for a window: you just make the rectangle for the window, and subtract it from the wall in your scene.
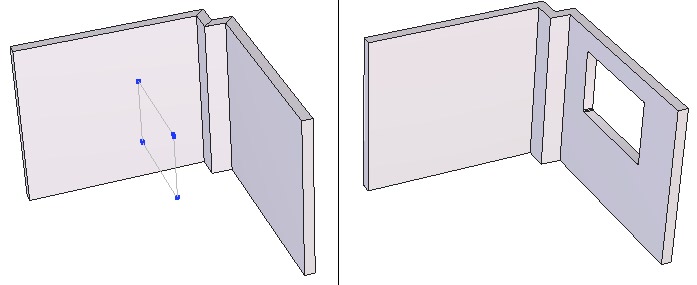
On the left, the wall form with a polyline for the size of the window, and on the right, the resulting form.
Usage:
Note: you can also choose for element B a curve which can punch a hole in the form of element A.
For example, to create a perforated grid. Make multiple copies of circles over a plane, then use the boolean tool on them, and in a few clicks get the desired results. The circles are automatically transformed into a volume cutting into the first shape. In this case the depth of the cut can be regulated using the stretch tool.
Options:
A Boolean operation creates a surface or volume by combining in different ways the two elements. There are 12 possible combinations, accessible in the tool options panel, either by clicking on the chosen icon, or by using the +/- keys to cycle through the choices:
Remarks:
![]() The thickness tool lets you give a thickness to a surface, volume, or a curve.
The thickness tool lets you give a thickness to a surface, volume, or a curve.
In the example of a building, the walls can be extruded from flat planes, and then the thickness tool is used to give volume to the walls. You can also enter precise numbers, among other options.
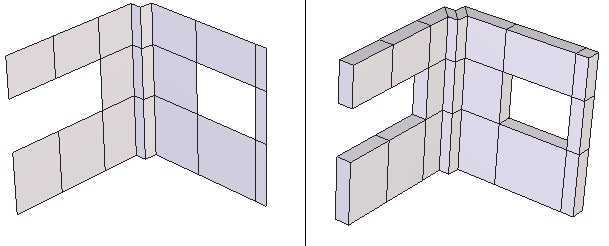
On the left, a simple plane of the walls, and on the right with the added thickness.
To rapidly create plumbing, electric cables or springs, simply give a thickness to any 2D line.
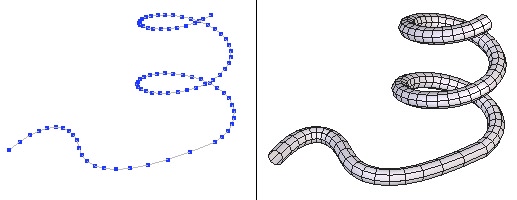
On the left a 3D spiral, and on the right the spring obtained with the thickness tool.
Usage:
Options:
Remarks:
![]() The offset tool lets you create an offset surface, at a constant distance to
the original.
The offset tool lets you create an offset surface, at a constant distance to
the original.
When you need an identical form offset by a certain distance from the original form, the offset tool is very useful. Unlike the thickness tool, this one does not connect the two elements together, which lets you make a custom connection later, if necessary.
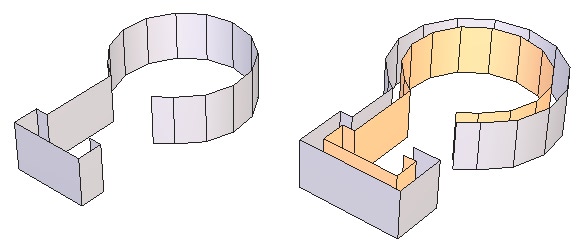
On the left is the original surface, and on the right is the offset surface.
Usage:
Options:
Remarks:
![]() The smoothing tool gives a smoother appearance to your polygonal objects,
whether a surface or curve. The result increases the number of facets describing
the surface, or segments describing a curve.
The smoothing tool gives a smoother appearance to your polygonal objects,
whether a surface or curve. The result increases the number of facets describing
the surface, or segments describing a curve.
This tool offers several types of smoothing, results of which vary depending on the chosen type.
In the majority of cases, this tool is applied as a finishing touch to give it a smoother appearance. In this way, a vase made of a section of six points and a profile of four points can be made less angular by applying this tool.
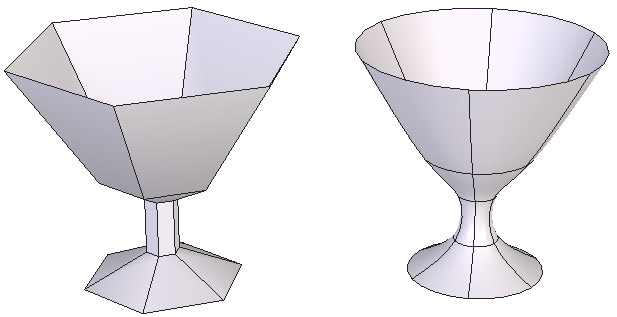
On the left is the original object, and on the right the object with smoothing applied.
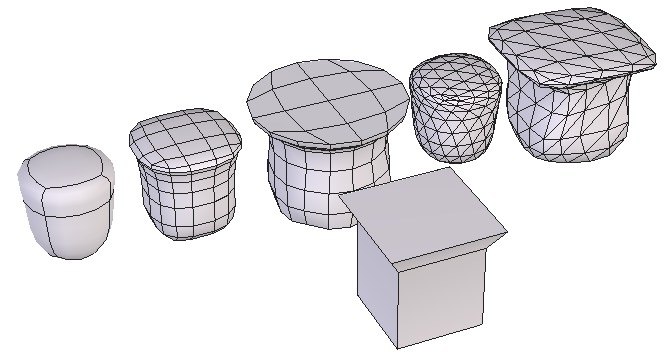
The original object and the five kinds of smoothing.
Usage:
Options:
Remarks:
![]() The chamfer tool lets you create smooth angles and corners, by rounding
chosen edges or vertices of a surface, volume, or vertex of a 2D polyline.
The chamfer tool lets you create smooth angles and corners, by rounding
chosen edges or vertices of a surface, volume, or vertex of a 2D polyline.
The tool needs input of the radius, which is the circular section that makes the edge or vertex rounded, and the range, which is the quality of the rounded edge, or how many facets/points will be created to describe this curved edge.
Most real objects seldom have truly sharp edges. To get this effect, use the Chamfer tool to round off the angles.
An example is right in front of you: look at your computer screen, whose shell probably has rounded edges, whether for safety or design or both.
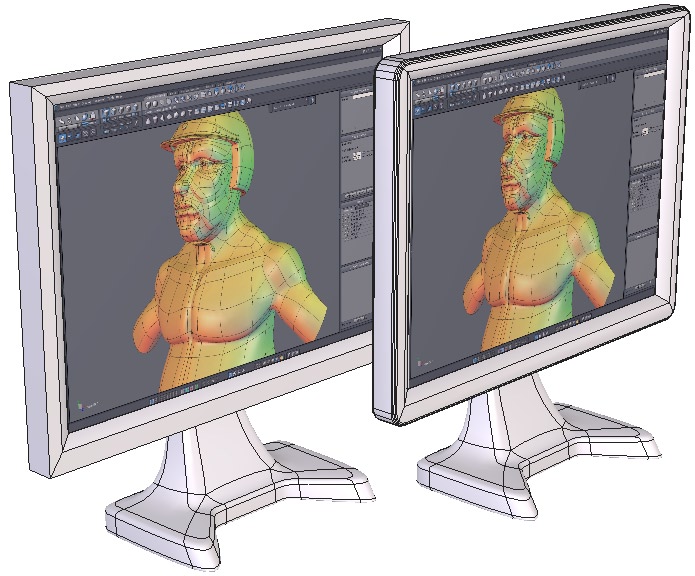
On the left, a corner of a computer screen before the chamfer, and on the right the corner after
being rounded.
The tool can also be used in making simple or complex curves. The simplest method of making a square with rounded edges is by applying a chamfer to the four corners.
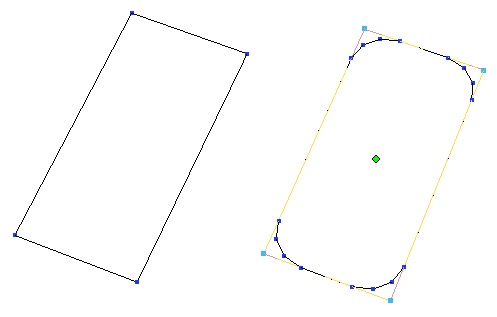
On the left a rectangle, and on the right with rounded corners.
Usage:
Options:
Remarks:
![]() The weld objects tool lets you join several objects together permanently, in
order to have one object. Not to be confused with the group tool which is only a
temporary association of objects. This tool is also located in the Vertex Modeling
Tab.
The weld objects tool lets you join several objects together permanently, in
order to have one object. Not to be confused with the group tool which is only a
temporary association of objects. This tool is also located in the Vertex Modeling
Tab.
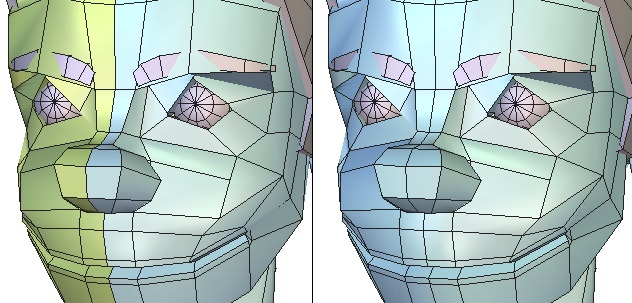
Left: the two independent objects. Right: the two objects welded together.
Usage:
Options:
Remarks: