Table of Contents
- 3D Manipulators

Polygon modeling is essentially based on the manipulation of 3D entities such as points, edges and faces, whether it is for the creation or editing of surfaces or volumes.
Hexagon is based a 3D Manipulator which lets you make 90% free-form models (organic forms without precision, for example) without ever leaving the manipulator to change tools, views, etc.
These 3D Manipulators offer incorporated accessories, which can be either be called up at any time by keyboard shortcuts, or by selecting corresponding icons.
The translation manipulator ![]() moves the selected elements. The manipulator is symbolized by arrow points (2D and 3D).
moves the selected elements. The manipulator is symbolized by arrow points (2D and 3D).
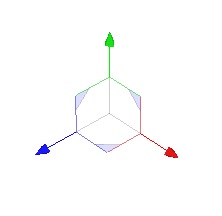
The translation manipulator.
Keyboard shortcut: T
The rotation manipulator ![]() rotates the selected elements. The manipulator is symbolized by circles.
rotates the selected elements. The manipulator is symbolized by circles.
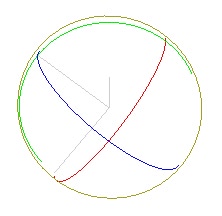
The rotation manipulator.
Keyboard shortcut: R
The scale manipulator ![]() scales the selected elements. The manipulator is symbolized by cubes.
scales the selected elements. The manipulator is symbolized by cubes.
This manipulator also shows a global interactive box which surrounds the object.
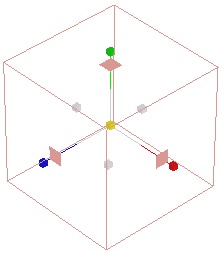
The scale manipulator.
Keyboard shortcut: S
The universal manipulator ![]() is a combination of the three fundamental manipulators.
It lets you perform moves, rotations and scalings without changing the tool.
is a combination of the three fundamental manipulators.
It lets you perform moves, rotations and scalings without changing the tool.
Using this manipulator is practical to move the objects globally. However for precise manipulations of 3D entities like vertices or edges, the number of clickable modifiers on each axis may become a problem.
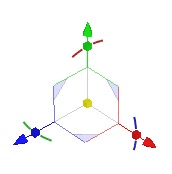
The universal manipulator.
Remark: The size of the manipulator is modifiable in the preferences.
Keyboard shortcut: U
The 3D manipulators and their accessories work according to the current selection. For example, if you are in select point mode, and you use the translation manipulator to move an edge, it will affect only the selected edges and not the other entities.
The working plane can be defined for the manipulators in the context menu located on the current manipulator:
This function lets you hide the manipulator when necessary, like when making complex selections around the clickable areas of the manipulator.
Keyboard shortcut: Space bar
Lets you delete the selected 3D entity. This function is available only by the Edit menu or by pressing the Delete key.
Keyboard shortcut: Delete
Lets you delete a selected entity, but reconstruct the geometry around it. This function works on select points, select edges and select faces mode. This function is available only by the Edit menu or by pressing the Backspace key.
Keyboard shortcut: Backspace
In object selection mode, when holding the Ctrl key (Command on MacOS) while moving, rotating or scaling, the transformation is applied to a copy of the original object. This allows you to speed up simple copy operations.
Remark:
The universal manipulator has numerous components, displayed in a small screen area. According to the point of view, it will sometimes be that case that theses components can hinder visibility, especially when a manipulator axis is oriented toward the camera. In this case, these components will be grayed and could not be selected.
When the camera will move around, the grayed components will be reactivated as previously.
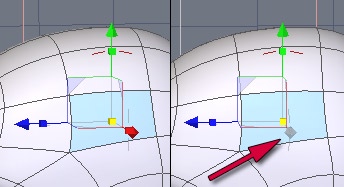
On the left, the grayed components and on the right, after a camera modification, the components are back.
The pivot is the center reference point of the selected object. Rotation and scale manipulators use this point as the center of rotation or the point of reference for scaling.
This accessory lets you temporarily redefine the pivot as a position other than the default, or define the position by modes of semi-automatic placement such as selection, world and bounding box.
Usage:
Notes:
This accessory lets you reset the pivot of an object if it had its pivot modified.
Usage: