User Tools
Site Tools
Sidebar
Spine
A tutorial by Orlan Lyle (Grendel).

We will be creating a spinal tail similar to the Alien movies and numerous other science fiction settings.
Start with simple vertebra object.
It doesn’t have to be medically accurate just similar.
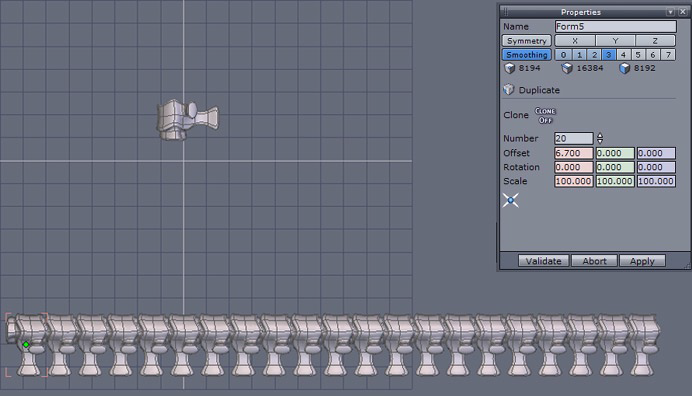
We will use the Multiple Copy tool found in the Utilities tab.
Depending on the length of your tail enter the number of copies you require and the amount each copy will be offset from the last I used twenty copies and enough offset to give the appearance of connective tissue between the segments.
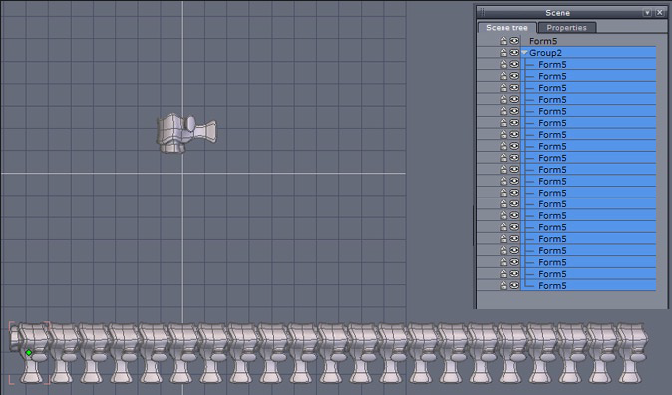
In the Scene palette open the new group, ensure all the segments are highlighted and then use the Weld tool in the Surface modeling tab to create a single object.
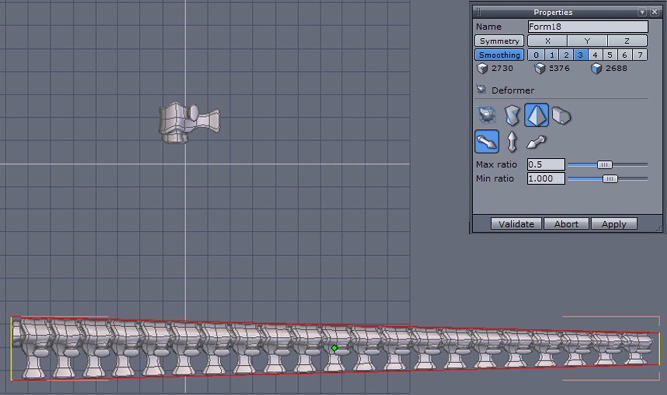
With the single form still selected we will use the Taper tool found in the Utilities tab in the deformer dropdown menu.
Select the axis required and scale down one end of the group to form a tapered end and validate.

Create a s-curve with one of either the interpolated, spline, or Bezier curve tools found in the Lines tab.
Increase the smoothing of the line in the Vertex modeling tab to increase the number of points over the line.
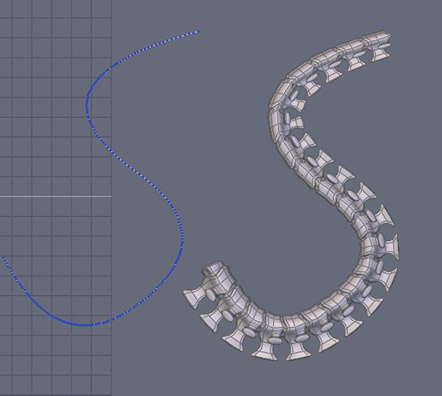
With the tapered vertebra group selected use the Bend tool found in the Utilities tab and then select your curve.
You should now have the bent the vertebra into the s-shape you created.

Just add a barb or another tip for your tail and your ready to attach it to another model for a gruesome addition.
Page Tools
Except where otherwise noted, content on this wiki is licensed under the following license: CC Attribution 3.0 Unported
