User Tools
Site Tools
Sidebar
Chain
A tutorial by Orlan Lyle (Grendel).

From the 3d Primitive tab create a grid with six vertical polygons and 10 horizontal polygons.
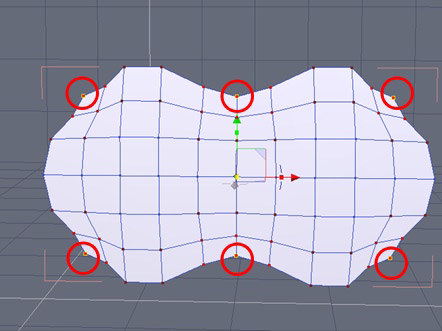
Select the corner and center points shown using soft selection (keyboard shortcut F) and scale them in to form the rough shape of the link.

Continue adjusting points until the outline is in shape then select the center points shown.

Delete the points to form the holes for the pins.
Adjust the points around the new holes into a circular shape.
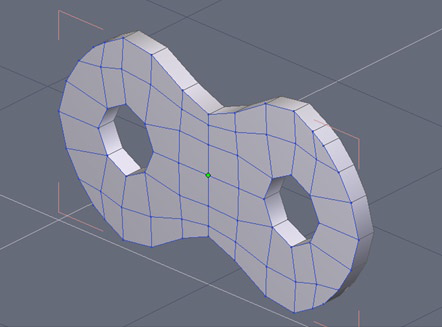
We will now give thickness to our grid by opening the Surface modeling tab and selecting the Thickness tool.

Select the edge loops shown and use Extract Around Edge tool found in the Vertex modeling tab to form a tight crease when smoothing is applied.
New in Hexagon 2 is the ability to create breaks (creases) in smoothing.
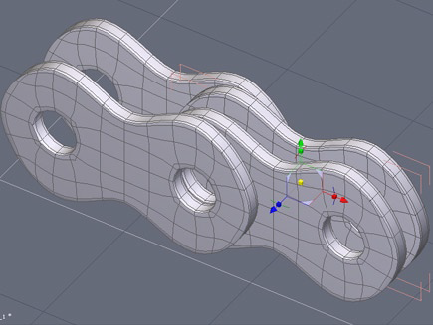
Copy and paste the link three times and position them as shown below. Two will be inset of the others.
Create two cylinders from the 3d Primitives tab and position them in the holes ensuring they are long enough to pass through each side.
Group together all the pieces we have made and weld them together using the Weld too found in the Surface modeling tab.
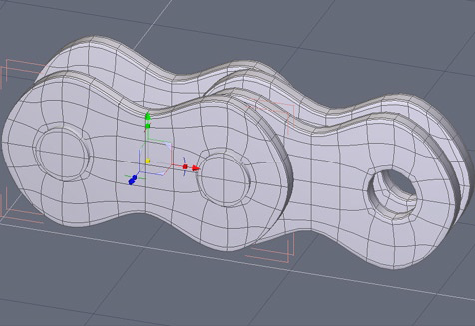
From this one unified piece you can now create a chain in any shape you require using the same technique illustrated in the Tank Track tutorial.

Shown above is a render of a length of chain created by replicating our single piece along a helix.
Page Tools
Except where otherwise noted, content on this wiki is licensed under the following license: CC Attribution 3.0 Unported
