Sidebar
How to Use the DSON Importer for Poser
This page is a WIP. There are likely to be incomplete and or missing steps while the page is being built.
Summary
The DSON Importer for Poser was designed to be simple to use and allow users to load content from their Poser Library in the same way that is already familiar to users. Once you have everything installed, open Poser and ensure you have mapped the locations to your new content.
Process Overview
What is Covered:
- How do I load Genesis?
- Genesis Needs Some Shape and Color
- How do I load Clothing?
- Help! It Does Not Fit!
- What Else is in the DSON Support Menu?
- A Few Things to Keep in Mind
Foundation
This tutorial assumes you have already installed the DSON Importer for Poser and mapped your Genesis Starter Essential directories (Runtimes) in Poser. If not, please return to: Installing the DSON Importer for Poser.
Step by Step
Step 1 - How do I load Genesis?
The first thing you need to do is browse to: “DAZ People” in the mapped directory (Runtime) that contains your Genesis Starter Essentials content. (Where you installed your new content.) This is where all DAZ base characters such as Genesis, Victoria 5, Michale 5, etc… are located.
Click on Genesis and load the figure. You will notice the first time you load the Genesis figure it loads slower than you may expect. Depending on your machine, and how many morphs and unique UV Maps you have installed for Genesis, it can take up to a minute. What is happening is a cache is being built so it will load faster the next time you load the figure. It builds this cache anytime you install a new Genesis based figure with Morphs or unique UV Maps. Once the cache is created, it will continue to use this and load faster until you make changes again.
Now that Genesis is loaded, let's have some fun!
Step 2 - Genesis Needs Some Shape and Color
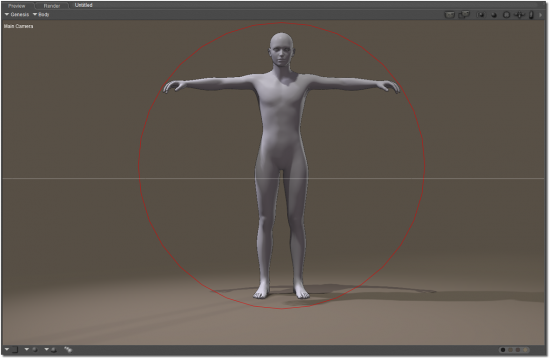
When you load Genesis, your first reaction may be “Wow, this character is pretty dull!” Genesis was made to be a base for a multitude of morphs and characters. You have the ability to blend any Genesis morph you have bought and installed into a single figure. This means you can take a bit of Michael 5, add a touch or Gorilla and toss in a bit of Alien to create your own unique blend.
Genesis does not use INJ/REM morphs like Poser or older DAZ Studio figures. Instead, any morph you have installed is stored in a “data” folder and is available to dial into Genesis in any percentage you desire.
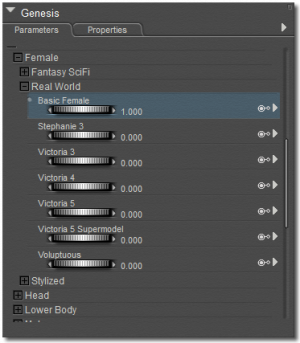
 To do this, select Genesis>Body and look at your Parameters pane. You should have a list of morph options with a (+) next to them. Let's hit the (+) next to “Actor”. Also expand Female > Real World. You should now see a list of any morphs you have installed that are Real World, Females. Change the value of Basic Female to 1.000. You should see Genesis change shape.
Now we have a more base female shape to begin working with. You can go into the other sections and adjust values and blend morphs until you are satisfied with your results. Have fun, and try blending different head values with different bodies. Mix and Match.
Materials are added the same way you have always done in Poser. The included materials for Genesis are located in: Materials > DAZ Genesis. Double-click “Sample Lana” to apply the skin material.
When you are done, move on to the next step to learn how to add clothing.
Step 3 - How do I load Clothing?
When you are ready to add clothing to Genesis, return to your “Figures” folder. Under “DAZ Clothing” expand the folder called “Magus”. You should see Boots, a Collar, a Jacket, Leggings and shorts. Let's load the shorts.
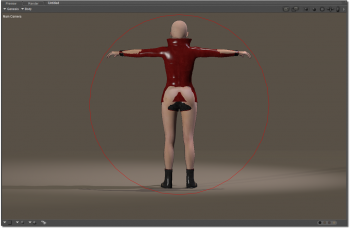
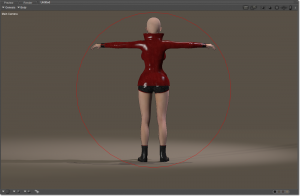
Make sure you have Genesis selected and double-click on the shorts. Once they have loaded, if they are not already selected, select the shorts. Go to Figure > Conform To… and choose Genesis. Nothing has changed! This is the same procedure you are already using in Poser. Simple isn't it? Repeat and load the rest of the set onto Genesis.
Step 4 - Help! It Does Not Fit!
 Clothing that is set as compatible with the DSON Importer for Poser should work fairly well inside Poser, but what happens when you change the figure morph and body parts start poking out everywhere?
Again, this is a simple task. First, select Genesis or one of the clothing items, then go up to your Script menu, select the DSON Support Menu and click on “Transfer Active Morphs”. This will do just what it says. It will transfer the active morphs in the figure (Genesis) to the clothing.
 Just that quick, our clothing now fits the changes we made to our morph setting! Depending on how the clothing was saved, some morphs will adjust automatically, some will not. If you notice the clothing does not conform to a morph you have dialed, run the script and your changes will transfer to the clothing.
You may run into instances where you still get a slight amount of poke through. Select the clothing item, go to your properties and check to see if the item has any adjustment or fit dials. You would use these the same exact way you do in your current Poser content with the same type dials.
From this point on, you can use and pose the Genesis figure as normal.
What Else is in the DSON Support Menu?
If you have looked at the DSON Support menu, you will have noticed two more options:
- Preferences - This allows you to set the following:
- Copy Shader Tree on Material Change
- Set the Cache Folder
- Select the Writable Runtime Folder
- View the Log File
- Subdivision
- Set SubDivision Level 0
- Set SubDivision Level 1
- Set SubDivision OFF
If your viewport is moving too slowly, you can set the figure's subdivision to “OFF” while you work within the scene. Turn it back to its previous value before you render. Genesis defaults to SubDivision Level 1. (This can also be set in MeshResolution > SubDivision Level in the Parameter Pane.)
A few things to Keep in Mind
- Some changes are slow to refresh - This can be seen in things such as posing and morph changes. Especially things that affect the figure cage with subdivision on. This is a known issue with the Poser viewport. In order to “refresh” the view you may have to “wiggle” the viewport to force a refresh. You can do this by jiggling the camera slightly back and forth.
- To Hide a body part - The “Visible” check box in your parameters will not work on Genesis. To hide a body part do the following:
- Select the body part.
- In the Parameters pane, scroll down to “MeshResolution” and expand it using the (+).
- Set SubDivision Exclude to “1.000 (1 = Exclude “ON”, 0 = Exclude “OFF”)
Tip: If the Genesis figure has SubDivision set to “OFF”, you can use the “Visible” checkbox to hide the bone, but if subdivision is turned back on before rendering, this may not work as expected. If you will be using SubDivision, use the “Exclude” method. See the Tech Notes for more details.

