Table of Contents
DAZ Studio 4.x
- QuickStart Guide PDF
- User Guide PDF
This page is a WIP. There are likely to be incomplete and or missing steps while the page is being built.

This tutorial will teach you how to switch from one Layout to another. For example, you may want to change from the default Hollywood Blvd Layout, to a more advanced Layout like City Limits.
Layouts do not affect anything inside your scene, however they do affect the Panes, Tool Bars, Menus and Activities. You can switch layouts at any time during your workflow.
Note: Resetting your layout to its previous state is as easy as repeating the steps below.
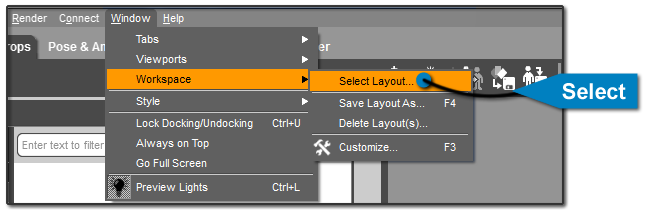
From the Main Menu Bar, select “Window > Workspace > Select Layout...”
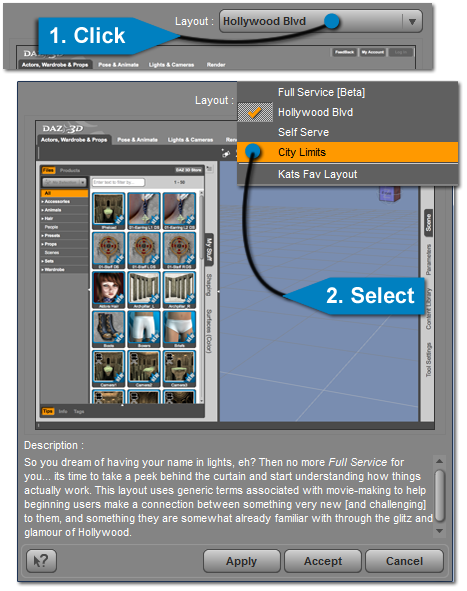 Click the Layout Selection button and choose a different one in the menu. Here, we are selecting “city_limits”. The Window will show the currently selected Layout as well as a preview of that Layout.
If you look closely, you will see the layout you have selected is different. The grouping have changed across the top, as well as the Panel structure and their locations. Depending on which Layout you chose, you may have access to more or fewer features in the UI.
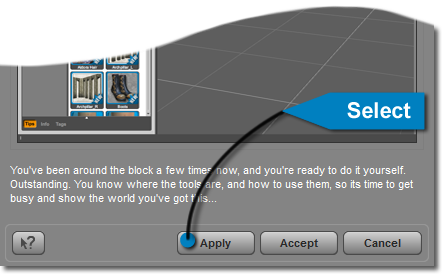 You can now choose to “ Apply” to preview the new Layout, or hit “Cancel” if you do not want to switch to the selected layout.
If you have already hit Apply and do not want the current selection, reselect your previous, or any other Layout, and hit Apply once again.
Layouts can be switched at any time without affecting your scene. One thing to keep in mind is that the layout you are switching to may have a different set of Panes open than the layout you are switching from. Therefore, in some cases you will have to open (or shut) Panes to meet your needs after switching to the new layout.
Other Related Tutorials:
