Sidebar
4.7
(4.7.0.12)
DAZ 3D strives to provide the ultimate user experience in each update of the DAZ Studio software. Along with various bug fixes, this update provides artists with new tools and workflow improvements that enhance ease-of-use and efficiency.
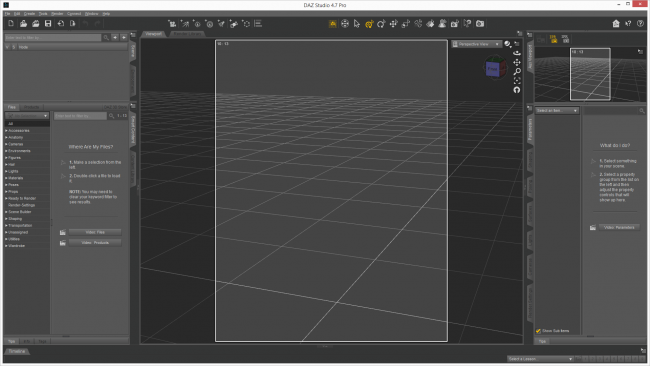
In this version, we have added a simplified layout that provides easier access to common use tools, while giving you a seamless upgrade path to a more advanced version of the layout when you feel ready. We have also re-imagined Scene Builder to maximize its usability, and added an Auxiliary Viewport with support for Interactive Progressive Rendering (IPR), so you can quickly get a glimpse the final result as you work. With updates to the User Interface, like an undockable Viewport Pane, Center Dock Area, Camera Local Dimension Override, Truly Transparent Backgrounds, and Script IDE Pane improvements, DAZ Studio 4.7 is designed with artists and innovators in mind.
Scene Builder (Redesign)
Scene Builder has been redesigned, and now presents a 'wizard' style workflow that is based on metadata (i.e. categories, compatibility). The new design steps you through choosing a Male or Female Character, choosing Hair and Wardrobe, a Pose, followed by elements of an Environment (optional). It also allows you to easily extend the available choices directly within the User Interface (UI), by assigning existing assets to various Scene Builder categories.
Scene Builder can be accessed from the “Home” page (left), which can be launched from the Help menu, by pressing the [Home] key on your keyboard, or by clicking on the Home icon in a toolbar (right). (see City Limits Layout and City Limits Lite Layout)
Note: Full functionality is dependent on the recent update to the Starter Essentials and Default Lights and Shaders packages; which provide new assets and required metadata.
Keyboard Scene Navigation
Now you can navigate your scene the way you would a “First Person” video game. Using the W, A, S, D, Q, and E keys on your keyboard, you can navigate left, forward, right, backward, up, and down (in order). You can also look around by pressing the I, J, K, L, U, O, and P (for leveling) keys, or by using the Scene Navigator Tool to click and drag in the viewport with your mouse.
In the toolbars of updated layouts (see City Limits Layout and City Limits Lite Layout), the keyboard icon (left) toggles the affect of the Scene Navigation hotkeys, allowing you to quickly switch between using the assigned keys for navigating your scene, and using those same keys to quickly jump to items in the various content panes. Used in conjunction with “mouse look” mode via the Scene Navigator Tool, you can [left] click and drag the mouse in the viewport to look around and the W, A, S, D, Q and E keys to move around the scene in a familiar video game type of way.
This method of navigation can be used to move and place cameras and lights into position more easily. The selected view is what you are controlling so switching between Perspective View, a specific light or camera allows you to move that view/object interactively.
Scene Navigator Tool
The 4-way directional gamepad icon (left) activates what is commonly referred to as “mouse look” mode. While this Viewport Tool is active, you can [left] click and drag the mouse within the viewport to rotate the active view/camera/light, like you would in many popular “First Person” video games. Deactivating “mouse look” mode is accomplished by selecting one of the other tools.
While the Scene Navigator Tool is active, the Tool Settings pane provides additional controls for manipulating your view. As an alternative, you can also use Keyboard Scene Navigation to simultaneously move about the scene.
Center Dock Area
The area previously reserved for the viewport(s) is now its own dockable area. This area can now be used to stack panes that consume more space; i.e. Viewport, Render Library, Shader Mixer, Shader Builder, Script IDE, etc.
Viewport Pane
The viewport(s) that previously consumed the remaining space between the left, right, top and bottom dock areas of the User Interface is now its own pane. This pane can be docked in the Center Dock Area for a familiar feel, or it can be undocked, floating and resized on a second monitor it that is what you prefer.
Note: Check the options menu for quick access to switching between multiple viewport layouts.
Aux Viewport Pane
DAZ Studio has had the ability to display multiple viewports in pre-configured layouts since the earliest versions. However, something it hasn't had is a separate, singular, auxiliary viewport, in its own pane, that can be used as a convenient, independently sized, alternate view of the scene. That is, until now.
This viewport also possesses a unique new ability called Interactive Progressive Rendering.
Interactive Progressive Rendering (IPR)
This new feature allows you to interactively and progressively preview the final render of your scene, while you work on it. It allows you to see near real-time camera, light and material modifications. It helps artists ensure that each part of the scene looks exactly as it was imagined, so any discrepancies can be spotted and edited as you go.
While the performance of the renderer is ultimately determined by the complexity of the scene and your system resources, the progressive nature of the renderer means you get a rough preview very quickly which is then refined as you wait.
Environment Pane
Setting the Backdrop for the scene has been moved to a new pane that is poised for future environment related settings.
Along with this change, we've added some functionality to the Backdrop. Such as, the ability to tint the Background image, the ability to use a solid color as the Backdrop (see note below), the ability to choose whether the Backdrop is Visible in Render, and the ability to undo adjustments to the Backdrop settings.
We've also added convenient actions to the option menu for automatically adjusting the [global] aspect ratio and/or rendering dimensions, found in the Render Settings Pane, to match the Background image.
Note: The color of the Backdrop for a scene has been decoupled from the color of a Viewport. Viewport colors can be modified in “Window > Style > Customize Colors…”
"Back to Base"
Selecting the “Currently Used” filter in parameter based panes now displays properties with a value that differs from the base figure value, instead of the properties that are different than their memorized values. For example, loading the Olympia 6 Character Preset will now show the Olympia 6 shape(s) as “Currently Used” because the morph property has a value that is different than the Genesis 2 Female base.
In addition, properties that are driven to a value by another property can now be adjusted to override the driven value, so that you can truly get “back to base.”
Truly Transparent Backgrounds
Now, when a Backdrop or Background Color is not included in a render (see Environment Pane), the transparent areas of the rendered image are displayed with a checkerboard pattern in the background (consistent with several popular graphics applications).
This version also resolves a long standing issue where anti-aliasing the edges of objects in the scene against the color of the viewport generated a 'halo' effect of that color.
Note: The color of the Backdrop for a scene has been decoupled from the color of a Viewport. Viewport colors can be modified in “Window > Style > Customize Colors…”
Camera Local Dimension Override
The Render Settings Pane is typically where you would find the controls for setting the global dimensions/aspect ratio for your render. These settings are used for all views/cameras you might render your scene from. New to this version, is the ability to override the global settings with camera specific settings.
This means you can have multiple cameras, each with their own unique dimensions/aspect ratio, all in the same scene. And the settings can be saved/loaded from Camera Presets for future re-use.
Render Settings Pane
Over the years, this pane has seen more than a few iterations. Each one being an attempt to improve the handling of a growing range of options, for a growing number of rendering engines. It was time for a change that allowed it to grow dynamically with new capabilities as they arrive. With that in mind, we've completely revamped this pane and given it a feel that is consistent with other areas of the interface. It may look a little different than you are used to, but it has all of the functionality of the previous iteration and it adds a number of improvements that already exist in other parameter based panes.
Among the improvements are features such as the ability to quickly filter which properties are displayed, the ability to see which properties are currently used and the ability to undo adjustments to the settings.
Script IDE Pane
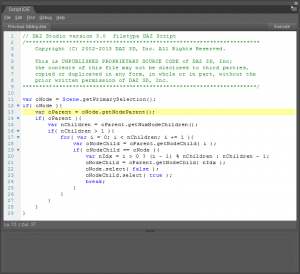
Having been a while since this pane was last shown some attention, it was time for a little TLC. Numerous improvements have been made to areas such as syntax highlighting, auto-indention, context menus, find/replace and the debugger.
Other features that have been added include: code folding, line numbering, bracket matching, multi-line indentation, case conversion, space/tab conversion and word marking (among others).
Configuration preferences have also been extended.
City Limits Layout
Updated this layout to incorporate the additions/changes mentioned above (and in the 4.7.0.12 Change Log).
City Limits Lite Layout
Darkside Style Default
The Darkside style has been set as the default for all new installations of DAZ Studio.
Extended Texture Format Support
Added support for using .EXR, .HDR, .PSD, and various others directly as textures.
Photoshop CC 3D Bridge Support
Added support for Photoshop CC to the 3D Bridge
Render Engine Update
Updated the 3Delight render engine to 11.0.105; see change log.


