User Tools
Site Tools
Sidebar
Coiled Phone Cord
A tutorial by Orlan Lyle (Grendel).

Create the basis for our coil cord using the helix tool found in the Lines tab. Ensure the radius at the beginning and end are the same and enter a value of twenty for the number of slices.
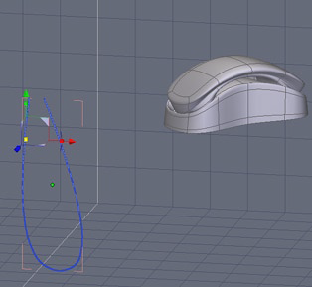
To bend the helix into the U-shape we require we will create a u-shape line with either the interpolated curve, spline curve or bezier curve all found in the Lines tab.
The most important thing is to have a large quantity of points on our guide curve for the bend to look its best.
You can add points to a line by increasing the smoothing in the Vertex modeling tab.
A helpful tip is to think of each point providing influence to the object being bent so the more the better

Select the helix we made in step one, then select the Bend tool found in the Utilities tab and select the u-shaped line we created to be the guide.
You should now have bent the helix into the shape of the guide we created.
If the geometry of the helix looks jagged or skewed then increase the number of points in the guide curve we created by increasing the smoothing further until a smooth bend over the entire length is achieved.

With the helix selected add Thickness to it by using the Thickness tool in the Surface tab until satisfied with the result.

To position the cord ends to the phone select the vertices on one end and use Soft Selection with a large radius(keyboard shortcut F) to move the end position.
Repeat for the opposite end.

Congratulations you now have a simple coil cord for attaching a handset to a receiver.
Page Tools
Except where otherwise noted, content on this wiki is licensed under the following license: CC Attribution 3.0 Unported
